Blogging 101: What to Do BEFORE You Publish a Blog Post
It’s safe to say that blogs have been a hit since the very beginning of the internet. It doesn’t matter if you’re a business owner or a blogger. Blogs are a great way to drive traffic towards your website. However, if you don’t optimise your blog post, you won’t be getting any traffic at all.
Think of it this way: you write a killer blog post, with all the right CTAs and information, and then you hit “PUBLISH.” And that’s it. Your blog’s now out there in the seemingly endless void of the internet. Billions of people access the internet everyday. In fact, about 7.5 million blogs are published everyday, but only a fraction of these blogs get noticed by people.
To ensure that your blog is one of them, you need to take certain steps before you publish it. By doing so, you’ll be drastically increasing the chances of people finding and reading your blog.
NOTE: This page contains affiliate links. This means that if you make a purchase through my links, I will receive a commission, at no cost to you.
Things to Check Before You Publish a Blog Post
It might seem overwhelming, but don’t worry! There are actually several little things you can do to make sure that your blog post is well-optimised. At the bottom of this post, you can find a checklist to help you get started.
1. Add a well-optimised title and meta description
Think of your blog’s title as a cover. While it’s said that you should never judge a book by its cover, on the internet, your blog title needs to be catchy to get people to click on it. Make sure your title includes the keyword of your article. It needs to be less than 60 characters (including spaces), and should be able to accurately reflect on the content of your blog.
The last thing you want is for people to click on a blog, realise that it’s not at all what they’re looking for, and to exit your site a few seconds later. That’ll lead to a higher bounce rate, which is bad (we’ll talk about it in a future post).
As for the meta description, this is that tiny bit of text below the title on the search results:
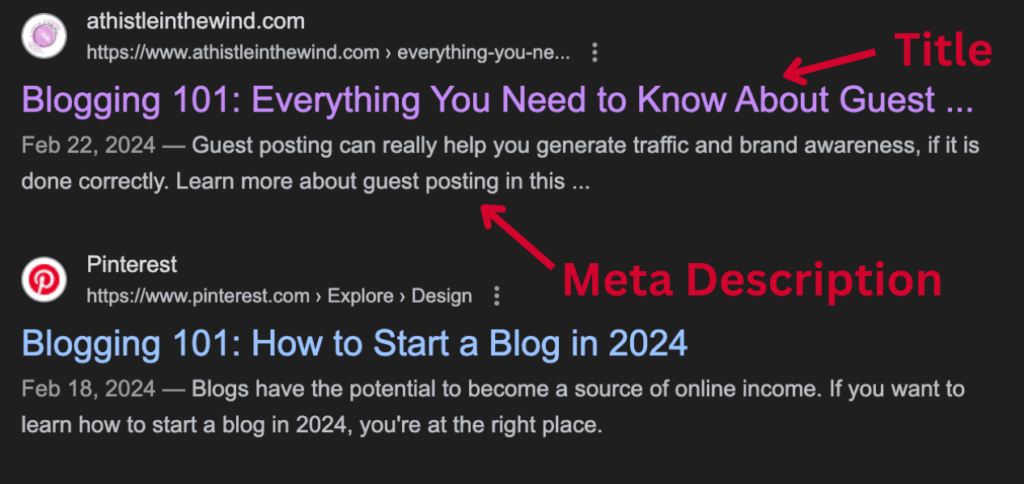
The point of the meta description, like the title, is to provide readers with an idea of what your post is about. Think of it as the summary. It needs to include relevant keywords, and be less than 160 characters. As with the title, you need to make it compelling enough to encourage clicks.
2. Write a clean, descriptive URL
URLs are often overlooked by people, especially new bloggers. Platforms, such as WordPress and Drupal, offer automatic URL generation, and most of the time, they’re correct. However, sometimes URLs tend to be long and complicated. Therefore, it’s important to keep them concise, easy to read and include the primary keyword.
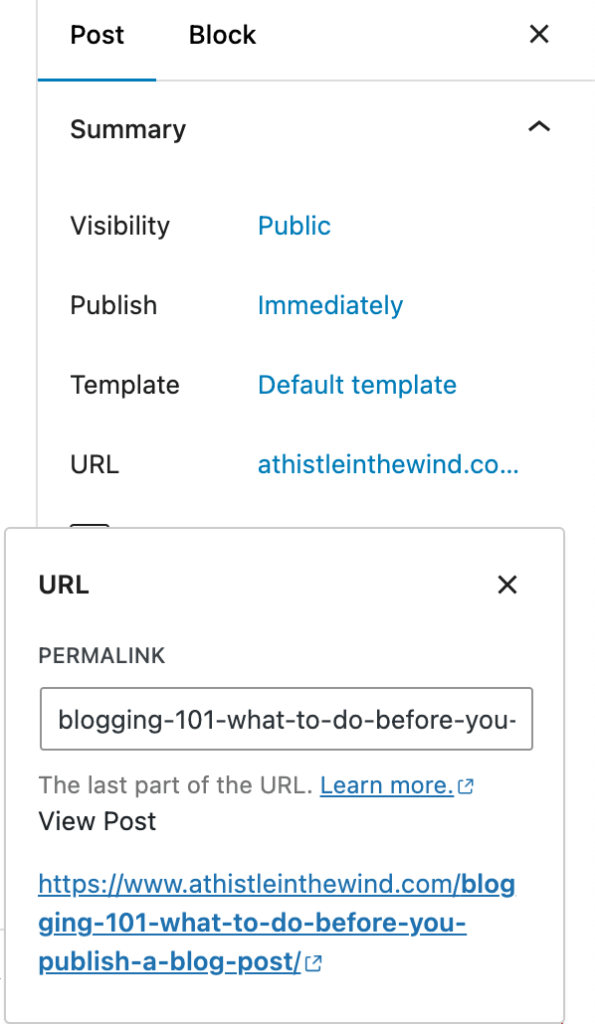
Having clear URLs also helps search engines understand what your blog post is about and improves its visibility.
3. Organise your text into chapters
It’s very, very important that you break up your content into smaller sections. Each section needs to have clear headings, and subheadings. Use H2, H3, H4, and even H5, if your blog requires it. Remember you want people to stay engaged, jump to sections where they may find the most value, and overall, interact with your blog post.
Additionally, organising your content into chapters also helps Google’s bots to crawl and map your content more easily. Basically, it’ll help Google understand where and when to promote your blog which will lead to better visibility – and that’s what we’re after!
4. Make your content readable
Following up on the previous point, your blog post needs to have short paragraphs, bullet points and numbered lists. This will make your content easy to read and scan. Most people skim through blogs they read on the internet so you must ensure that your content is skimmable.
It might be a good idea to highlight key takeaways or important points using bold or italics. A clear and concise writing style helps readers quickly grasp the main ideas of your blog post.
5. Add a featured image
Many of my regular readers must’ve noticed that I include a feature image, or a cover, that I create with every blog post. In addition to looking aesthetically appealing and matching my branding, it’s important to have an appealing and relevant image to represent your blog post.
A featured image can create brand awareness, capture readers’ attention and entice them to click on your blog in search results or through social media shares. Personally, whenever I publish a blog, I post my feature image on Pinterest (where I get most of my traffic from) to let people know that there’s a new blog up.
Over the past few months, I’ve noticed an uptick in my traffic whenever I post these images on Pinterest.
6. Optimise your images
Image optimization is very important. Large file sizes can impact your page’s load time, driving away readers, and in turn, traffic. Therefore, it’s very important to make sure that you compress images without sacrificing quality. There are plenty of plugins available on WordPress that you can use for this. I like to use WP Rocket.
In addition to image optimisation, it’s a great caching tool that significantly reduces your site’s load time. And trust me, you need your load time to be at the minimum. Users spend less than 3 seconds waiting for a site to load. The competition is tough, and one way to do that is by optimising your images.
7. Add internal and external links (and make sure they work!)
Make sure you link to other relevant blog posts on your website to direct readers to related, valuable content on your site. Again, this is really good for engagement, and can help you create a dedicated community. Such links are called internal links, and ideally, you should include two or three relevant blog posts. Remember, Google’s crawlers check this to create relevant site maps so make sure you’re directing readers to related pages. The last thing you want to do is litter your blog with internal links. It’s just annoying, and readers can tell what you’re up to, so doing something that might turn them away from your site.
External links, as the name suggests, directs readers away from your blog to other sites. In my blogs, I like to use external links to direct readers to authoritative sources, usually to provide additional context or support claims. Ideally, you want three or four of these. Again, make sure that links are relevant.
Also, having good external links can really boost your site’s domain authority. So, it might be a good idea to include authoritative sites from your industry.
8. Add categories and tags (if applicable)
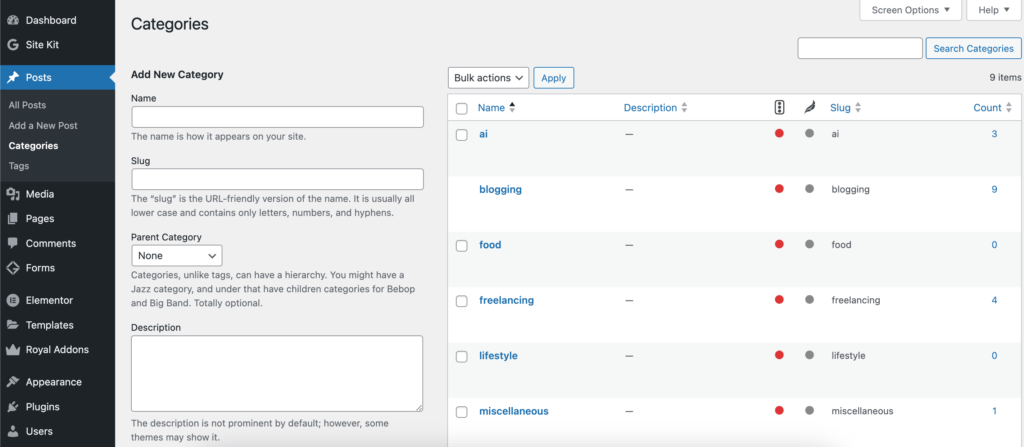
If you’re blogging about a bunch of things like I am, it’s a great idea to categorise your blog posts. This helps readers find your content more easily. You can easily find the tags and categories section on WordPress:
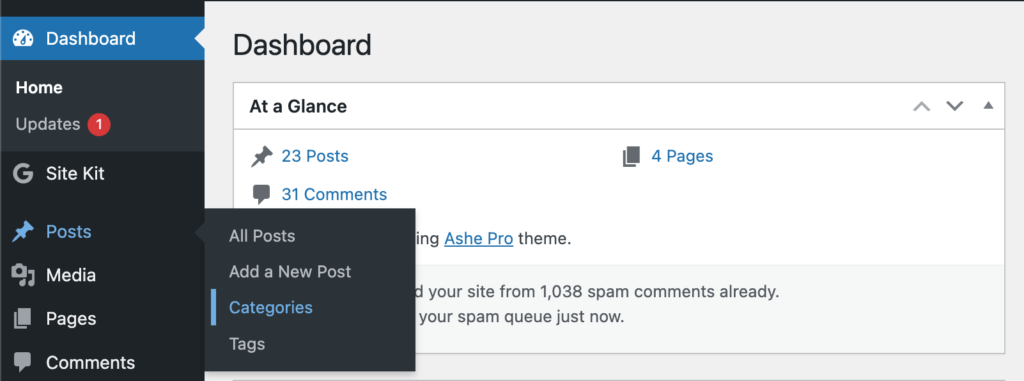
Here’s a glimpse of my category section on WordPress:
Additionally, you should use tags to highlight certain keywords or topics within your blog. This makes it easier for search engines to index your content, and well, it leads to higher visibility.
9. Include a Call to Action
Last, but definitely not the least, always remember to add a call to action (CTA) before you publish a blog post. This one will vary depending on your blog’s aim. You can have a CTA directing readers to a specific service or product you offer. Or, you could ask them to leave a comment. Basically, the point of a CTA is to prompt readers to take action, and that depends on the objective of your blog post.
In the next few weeks, I’ll have finished setting up my newsletter (blog post coming on that soon!) so I’ll create a CTA for that. A clear CTA makes the intention of your blog relevant, and can make a HUGE difference if you’re using blogs to sell products. Don’t forget it!
10. Proofread
And finally, make sure to carefully review your blog for grammatical errors, spelling mistakes and typos. Publishing a blog littered with mistakes is a big turn off for readers. It diminishes the authority of your blog and calls your content into question.
While I recommend reading your work at least twice before you publish a blog (and once after it, in case you missed a pesky comma here and there), you can use tools like Grammarly to help you out with that.
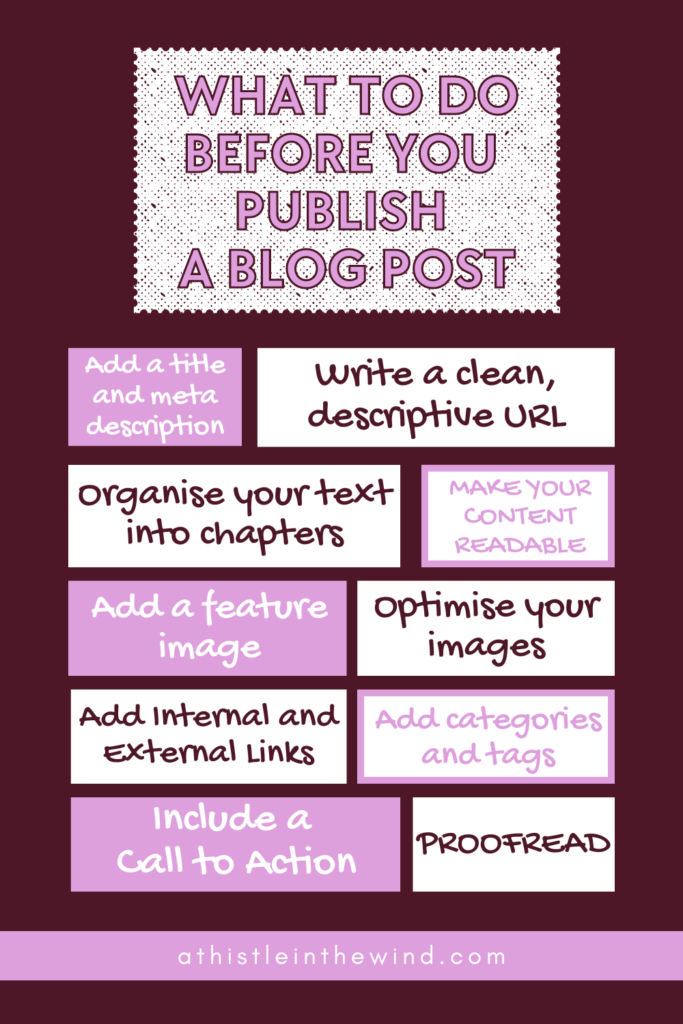
Make Sure to Follow These Steps Before You Post A Blog!
By following these essential steps before you hit the publish button, you’ll be well on your way to creating blog posts that are not only informative and engaging but also primed for maximum visibility and impact. Remember, a little extra effort upfront can make a significant difference in the success of your blog.
If you’re interested in learning more about blogging, check out these posts:
- How to Write A 2,000 Word Blog with AI tools in 2 Hours (Or Less)
- Blogging 101: Best Blogging Tools to Grow Your Blog in 2024
- How to Plan A Content Calendar (and Stick to It): A Guide
What do you think of these tips? Let me know what you do before you publish your blog post!


15 Comments
Joanna
Thanks for the checklist! i will be using this for my blogs
Beren
I’m going to share this with marketing. Smart idea to put this into a blog post!
athistleinthewind
Thank you, Beren!
Beren
Thank you for the informative blog, Sura!
Luftn
Really important key points everyone should know
Detre
i think a pdf version of this checklist would be great for us bloggers. would be interested in your insights
Rumer
Hello to everyone who came from Pinterest!!!
skoraya
important information here for people publishing their blogs
Timothy
Promoting a blog is really tough too, what do you recommend?
Ronald Gill
I believe it’s difficult to find a blog that deals with the issues faced by new bloggers or those with little expertise in this sphere. I appreciate that you’re not trying to sell me a course or sign up for a bogus email list. Keep up the good work!
Timothy
Important stuff, thanks for compiling these points together
Michael
Great job!
Demi
I really enjoyed your article!
Sophie
Great points, thanks for the info!
Karen
great insights!