How to Create Notion Templates You’ll Actually Use (+ Free Template to Get You Started)
Okay, so I’m big on scheduling and organising myself. And to do this, I like to use Notion. In fact, I’ve been regularly using it since 2022, when it was introduced to me at work. It was our company’s project management tool.
It was great at that and I ended up using it for other stuff too. Think about this blog, my manuscript edits, even budgeting and keeping track of expenses.
But it wasn’t a switch-flip moment for me. I didn’t always look at my Notion page regularly, and it’s because I wasn’t using a Notion template that worked for me. I actually ended up doing a lot of fine-tuning of my Notion page to get something I could look at every single day and track what I’m up to.
And that’s something a lot of people struggle with: finding Notion templates that actually work for them. If you’re into productivity, you’re probably interested in having a dashboard or setup that looks good, is easy to stay on top of, and also useful.
In this blog, I’m going to help you create Notion templates that stick, give you examples you can borrow from and share resources if you want to go deeper. Plus, if you’re just starting out with using Notion, I’ve also got a free starter Notion template you can use for any project of yours (bloggers will find that it’s really easy to convert this into a blog management template).
Now, let’s start!
Why Most Notion Templates Fail
Before we start, let’s take a look at why you don’t actually use them. This’ll help you understand what to avoid when you’re creating your own Notion templates.
Here’s the truth: most templates you’re downloading online are built to look good, not to work well. Sure, there are some that are great but let’s be honest: there’s a lot of noise online when it comes to free downloadable content. And yes, Notion templates fall into that digital product category.
If you’ve ever downloaded Notion templates to use later, here’s why you probably ended up never looking back.
- It was too complicated: Templates with endless dashboards, databases, and properties look powerful at first glance. But if updating your dashboard takes more time than the work itself, you’ll stop using it.
- It’s all aesthetic over function: Covers, icons, widgets—they’re fun to add, but they don’t make a system usable. If your template is slow to load or hard to update on your phone, it won’t survive real life.
- It’s not tied to your routine: A system only works if it fits into your habits. Templates fail when they fight your natural workflow.
- It’s a copy-paste setup: People grab someone else’s template and expect it to work out of the box. A template designed for someone else’s goals won’t automatically match yours.
- It offers no flexibility: Rigid structures break the moment you try to tweak them. If adding or removing sections feels like dismantling a Jenga tower, you’ll eventually ditch it.
This is exactly what we’re trying to avoid in the Notion templates we create today. It’s not about discipline—it’s about having a setup that actually works with your life.
Principles of a Template You’ll Actually Use
Okay, so now that we’ve established what doesn’t work, let’s take a look at what does work. What actually makes a Notion template worth opening every day?
Here’s what to keep in mind when you’re building your own:
- Keep it simple: Start small. A task tracker with three properties (Task, Deadline, Status) is infinitely better than a bloated “Life OS” you never update. If it feels overwhelming on day one, it’s doomed.
- Make it flexible: Your needs will change. Maybe you start with a simple reading list, and six months later, you want to track ratings, notes, or progress. A good template lets you add or remove without breaking the whole system.
- Tie it to your routine: The best template is the one you naturally check. If you plan your week every Sunday, create a weekly review page. If you work in daily sprints, set up a daily planner. Don’t force habits you don’t have.
- Use templates inside databases: Notion has this underrated feature where you can pre-fill pages inside a database. For example: in a “Content Calendar” database, you can create a “Blog Post” template with sections for intro, draft, edit notes, and publish date. It saves you from reinventing the wheel each time.
- Prioritize speed of use: Ask yourself: can I update this in under 30 seconds? If the answer is no, you won’t stick with it. Templates should reduce friction, not add more.
At the end of the day, a template you’ll actually use isn’t about looking good—it’s about making your life easier. And the simpler and faster it is, the more likely you’ll stick with it.
How to Create Your Own Notion Template: A Step-by-Step Guide
As I’ve said before, the best Notion templates aren’t copied from someone else’s dashboard. They’re built for you. Here’s how you can make one from scratch that works for you.
1. Define the Purpose
This is the step most people skip, and it’s why their templates never stick. Before you even open Notion, you need to decide what exactly your template is supposed to do. Without a clear purpose, you’ll just create another page that looks nice but sits unused.
Think about the problem you’re trying to solve.
- Freelancer: Maybe you’re juggling multiple clients and deadlines. A Client Tracker helps you see who you’re working with, what’s due, and whether you’ve invoiced them.
- Student: You probably need a Semester Dashboard to keep all your classes, assignments, and exams in one place. Instead of flipping through five different apps, you’ve got one command center.
- Blogger: A Content Calendar can save your sanity—track ideas, drafts, edits, and publish dates so you’re not scrambling at the last minute.
The point isn’t to copy someone else’s setup, it’s to build something that solves your pain point. If you don’t have that nailed down, you’ll quit using it after a week.
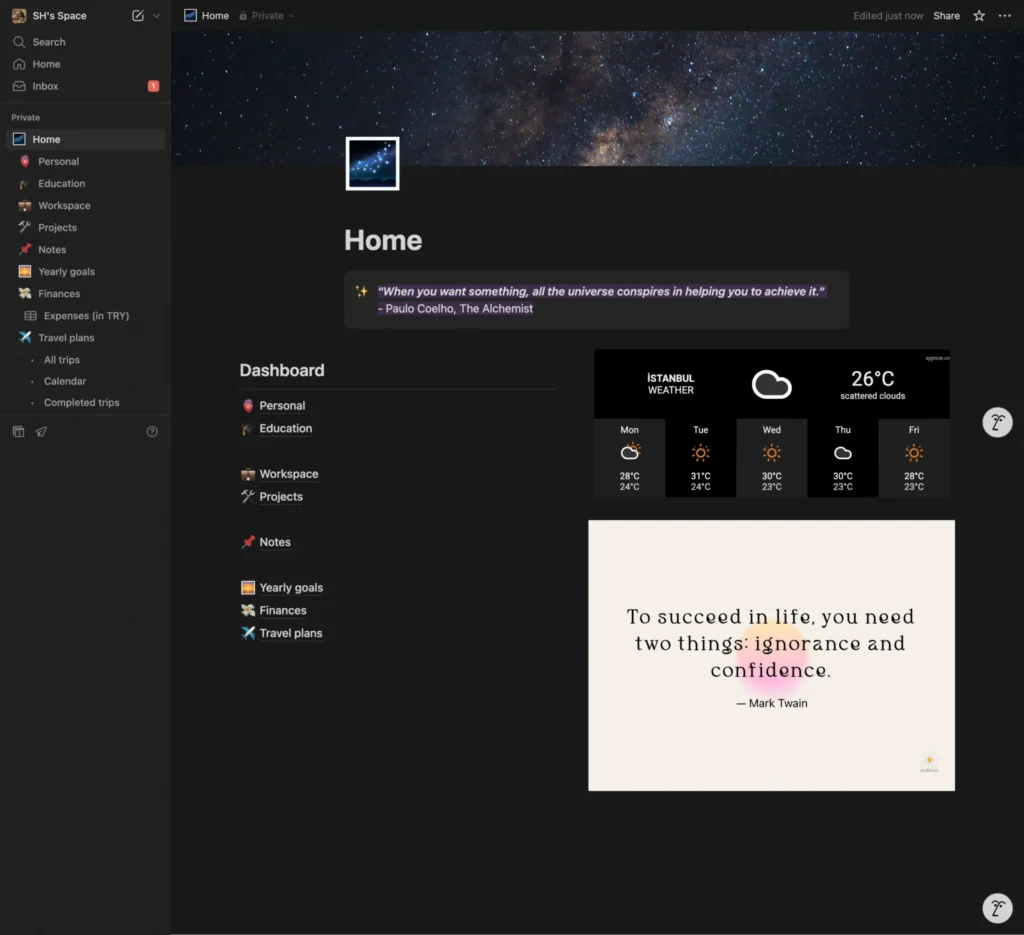
Example from my own setup: I use Notion to run everything: personal life, education, projects, finances, even travel plans. But each one has its own space so I don’t get overwhelmed. My sidebar is split by category, which makes it easy to switch contexts without clutter. That’s the whole point. Make it so easy to jump between areas of your life that you actually enjoy opening Notion.
2. Decide: Database or Page?
Once you know the purpose of your template, the next question is how to build it in Notion: as a page or a database. The choice matters, because it shapes how you’ll actually use the template.
Pages work best when you just need a space to write or collect simple lists. Think:
- A goals page with text and checklists.
- A meeting notes page where you dump ideas as they come.
- A short reading list that doesn’t need sorting or filtering.
They’re lightweight, fast to set up, and perfect if you don’t need advanced features.
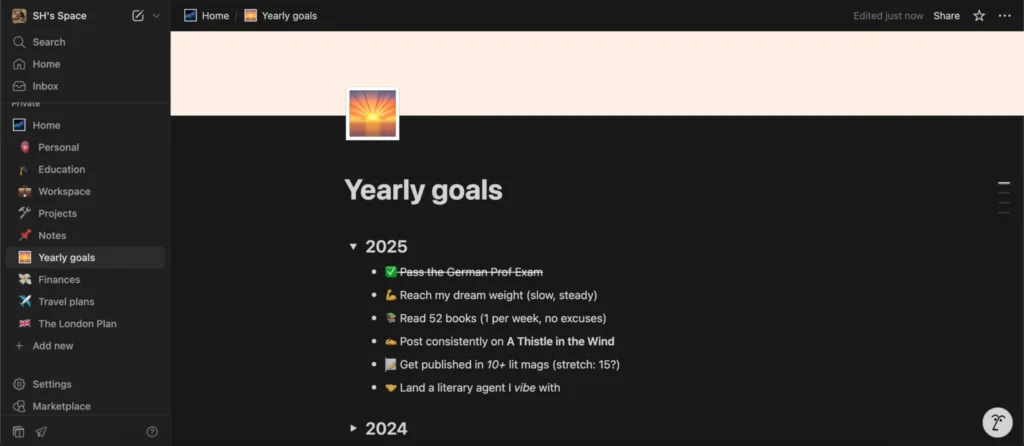
Example from my own setup: I keep my yearly goals on a single page—it’s just text with checklists and a few emojis for personality. That’s all it needs.
Databases, on the other hand, shine when you’re dealing with repeating items that need consistency, sorting, or filtering. Think:
- A task tracker where you log dozens of to-dos every week.
- A content calendar for blogs or videos.
- A budget tracker that records expenses, income, and totals over time.
Databases let you add properties like dates, tags, or status, and you can switch between views—table, board, calendar, timeline—depending on what you’re tracking.
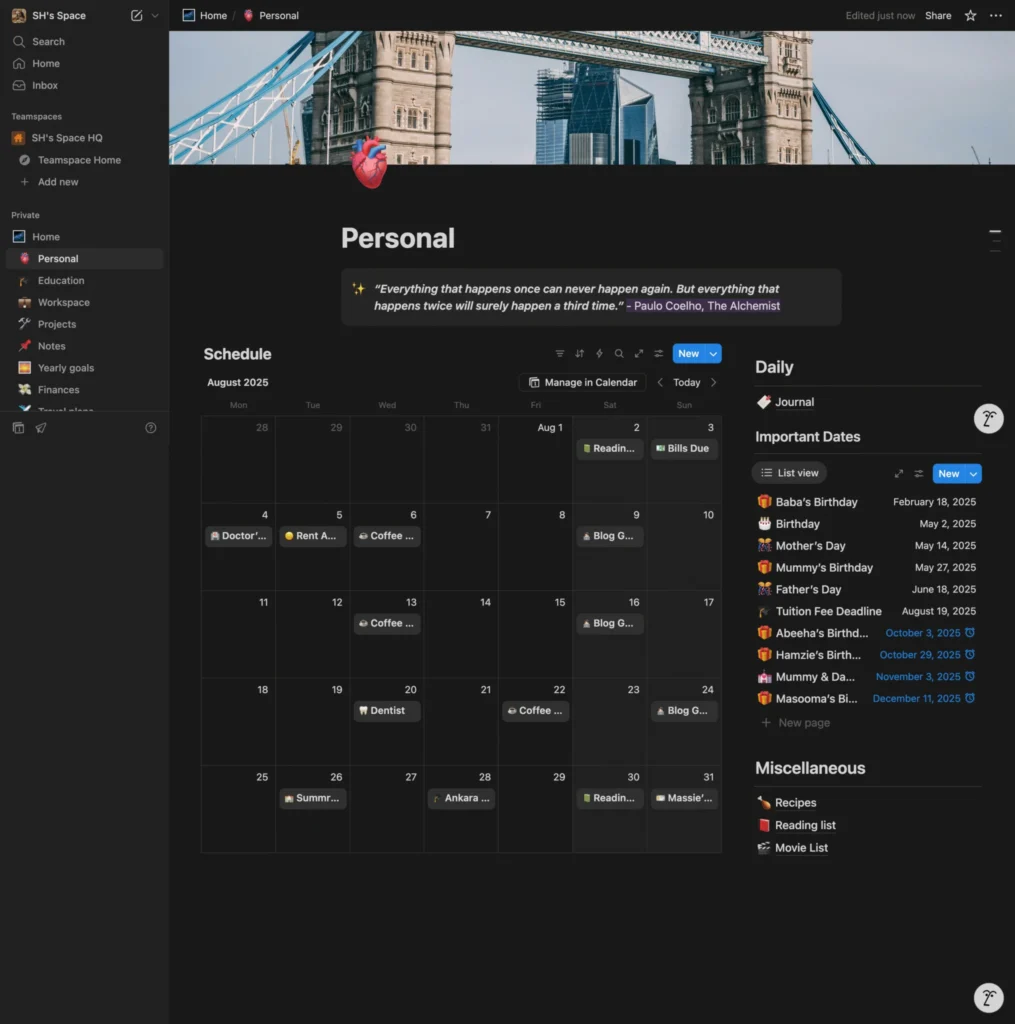
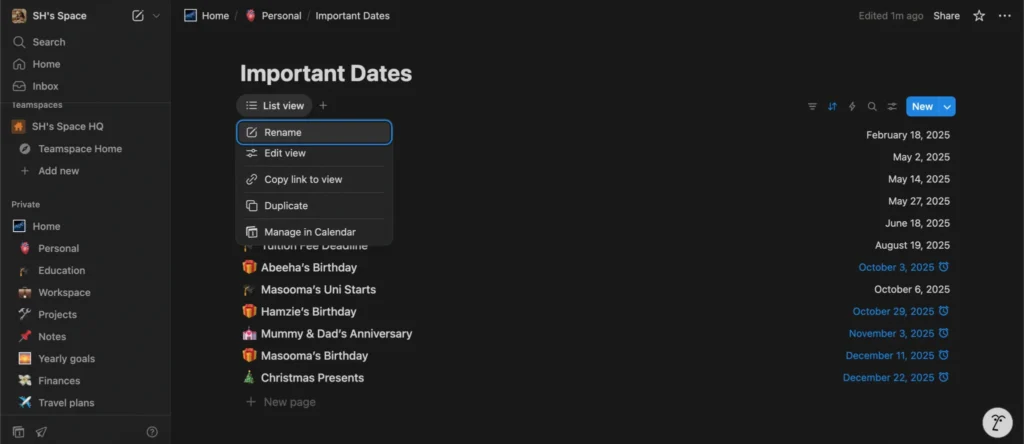
Example from my own setup: My Personal section is built on a database. I use a calendar view to manage my daily schedule: remind myself if I have to pay bills, go to the doctor’s or out for coffee with people. I have birthdays and events under “Important Dates.” I also have sections for Recipes, My Reading List, Movies too because those are low-key the only other hobbies I have.
At the end of the day, keep it simple. The rule of thumb is:
- If it’s freeform or doesn’t repeat, use a page.
- If it’s recurring and needs structure, use a database.
That’s why my yearly goals live happily on a page, while my personal life runs inside a database. Both serve different purposes, but together they keep me on track.
3. Create a Minimal Structure
One of the biggest mistakes people make when building Notion templates is over-engineering it from the start. It’s tempting to add every property you can think of: priority levels, tags, categories, relations, progress bars. But if you start bloated, you’ll never stick with it.
The goal here is to get a minimum viable template working. That means only adding the essentials you actually need to make it functional. Once the basics are solid and you’ve tested them, then you can layer on extra features.
Here’s what a minimal structure looks like in different contexts:
- Task Tracker: Task, Deadline, Status
- Reading List: Title, Author, Status
- Project Manager: Project, Owner, Due Date, Status
That’s it. Just enough structure to track the basics.
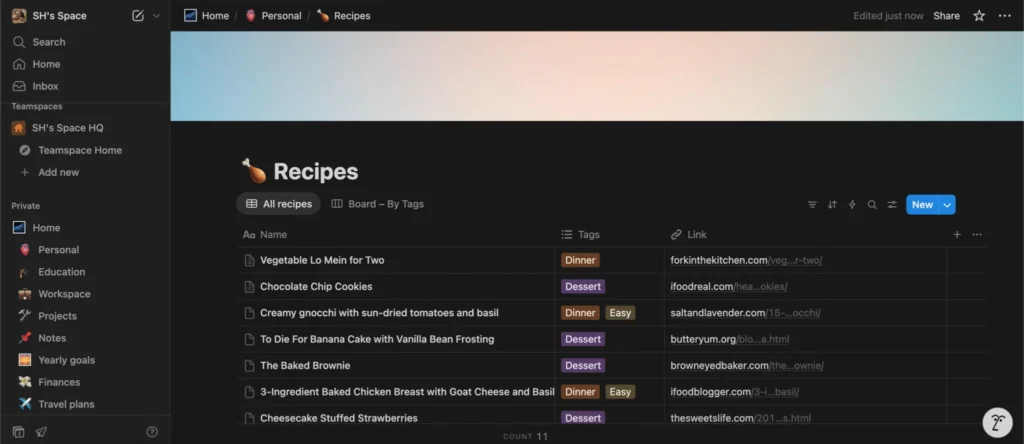
Example from my own setup: When I built my Recipes database, it started out as a super simple list: just the Name of the dish and a Link to the recipe. That was enough to keep things organized. Only later did I add Tags for “Dinner” or “Dessert,” and difficulty levels like “Easy.”
Pro tip: If it feels overwhelming on day one, it’s doomed. Keep it lean, test it, then expand as you actually use it.4. Add Useful Properties
Once you’ve got the minimal structure working, the next step is layering in properties that actually make your template more powerful. But the keyword here is useful. Don’t add properties for the sake of it, only add the ones that help you make decisions faster or keep things organized.
Think about what extra context would make your database easier to use at a glance.
Examples:
- Task Tracker: Priority, Tags, Linked Project
- Project Manager: Status, Budget, Completion %
- Reading List: Genre, Rating, Notes
Example from my own setup: My Recipes database started with just Name + Link. Once I knew I was sticking with it, I added:
- Tags: to group meals into Dinner, Dessert, or Breakfast.
- Difficulty level: so I could see which recipes are quick vs. complicated.
- Source link: the original recipe site (already in place from day one).
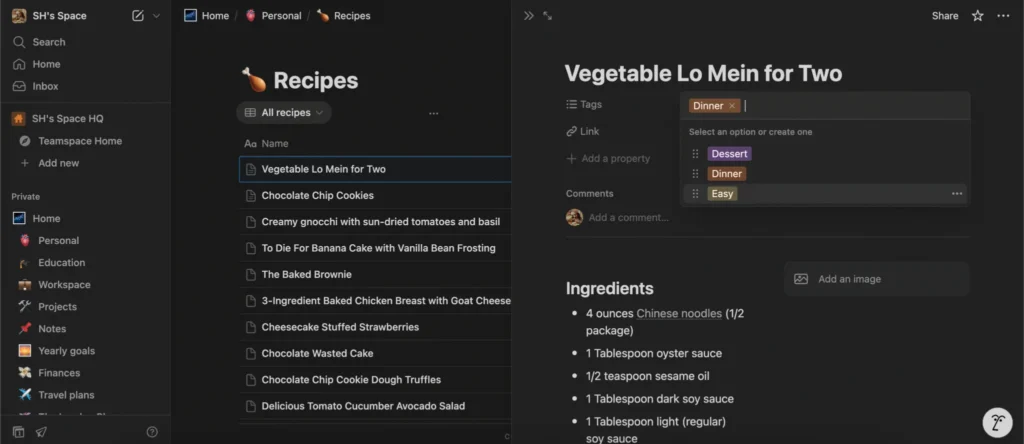
These extra fields transformed it from a flat list into something I can filter and sort. Want to see only quick dinners? I just click the “Easy” + “Dinner” tags. Want to pull dessert ideas? One filter and I’ve got them.
Pro tip: Add new properties only after you’ve been using the template for a while. If you don’t miss the info in real life, you don’t need the property.5. Build a Template Inside the Database
Here’s where Notion really starts to shine: templates inside databases. Instead of starting from scratch every time you add a new entry, you can create a pre-filled template that gives you a consistent structure. Why this matters:
- You save time; no need to recreate the same sections over and over.
- You avoid missing steps, because the structure is already built in.
- You can standardize workflows, whether that’s for tasks, projects, or blog posts.
Examples of when templates help:
- A Task database where every task page opens with sections like “Description,” “Checklist,” and “Deadline.”
- A Content calendar where every blog post page starts with an SEO notes section, outline headings, and publish checklist.
- A Project tracker where every project entry already has “Goals,” “Resources,” and “Deliverables” blocks ready to go.
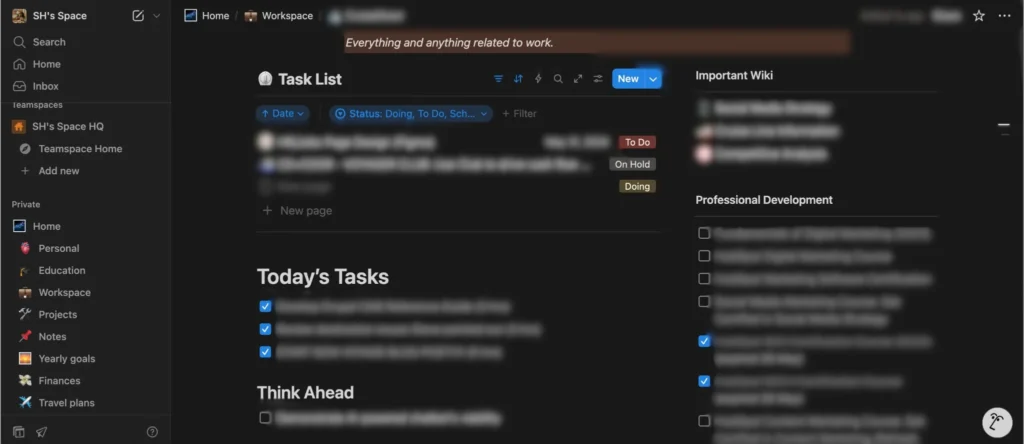
Example from my own setup: My Workspace database is where this becomes essential. Each task template includes:
- Properties: Task title, Status (To Do, Doing, On Hold, Done), and Due Date.
- Sections inside the page:
- Today’s Tasks checklist
- Think Ahead area for upcoming work
- Professional Development checklist for certifications and learning goals
So when I create a new task, I’m not staring at a blank page; I already have the structure I need to fill in.
Pro tip: Even the best templates won’t stick if they’re too detailed. Start with a skeleton template—just the basics you want to repeat every time—then add more later if you actually use it.6. Automate With Notion Features
Once your template is working, the next step is to make Notion do some of the heavy lifting for you. Notion isn’t just a digital notebook; it comes with built-in automation tools that keep your setup running smoothly.
Here are the ones worth using:
- Filtered views: Instead of scrolling through everything, create views that only show what matters right now like “This Week’s Tasks” or “Upcoming Deadlines.”
- Calendar view: Any database with dates can instantly flip into a calendar. Perfect for tracking deadlines, birthdays, or recurring events.
- Reminders: Add a reminder property so Notion pings you before an event or deadline. It’s a simple way to make sure important dates don’t slip through.
- Relations and rollups: If you want to get fancy, you can link two databases together (e.g., tasks → projects) and roll up progress. Not essential at first, but powerful once you’re comfortable.
Example from my own setup: My Important Dates database started as a simple list. But once I added reminders and switched the view into a calendar, it turned into an automated system. Now I don’t just see birthdays and deadlines; I get pinged before they happen, and I can glance at the calendar to know what’s coming up next week.
Pro tip: Start small. Use one automation (like reminders) before you add more. It’s better to build confidence step by step than to overwhelm yourself with features you don’t need yet.7. Test It in Real Life
A template only proves itself once you start using it. You can build the most polished dashboard in the world, but if you don’t actually open it, it’s useless. That’s why testing your setup in real life is a critical step. Here’s how to stress-test your template:
- Use it daily for a week. Don’t tweak anything during that time—just live with it and see what feels natural vs. frustrating.
- Notice the friction. Did you avoid updating it because it took too long? Did you feel like information was missing? Did it feel like more work than it was worth?
- Spot the gaps. Sometimes you realize you need an extra property (like “Priority” on tasks) or a new section (like “Notes” on a project).
- Check your habits. If you naturally open Notion at certain times (morning planning, end-of-day reflection), lean into that and make your template support those moments.
Think of this as a trial run: you’re not aiming for perfection, you’re just making sure your template works with your real routines instead of against them.
Pro tip: If you go a full week without opening the template, that’s your signal it needs fixing—not that you need more discipline.8. Refine and Personalize
Once you’ve tested your template and confirmed it works, the final step is to make it feel like your space. This isn’t about turning Notion into a Pinterest board; it’s about adding just enough personality and organization so you actually enjoy opening it.
Here are ways to refine and personalize without overloading:
- Add icons and covers: A little visual cue goes a long way. A book icon for your reading list, a dollar sign for your budget tracker, or a coffee cup for your personal dashboard makes it easier to scan quickly.
- Color-code properties: Assign colors to statuses (e.g., Draft = yellow, Published = green, Archived = grey) so you can tell what’s happening at a glance.
- Tweak your views: Maybe you prefer a board view for tasks, or a gallery view for recipes. Set up the view that feels most natural to you, and hide the rest.
- Layer in dashboards (only if you need them): A dashboard can pull your most important databases into one page. For example, a “Weekly Overview” that shows this week’s tasks, events, and deadlines in one place.
But here’s the key: don’t confuse personalization with productivity. A nice cover photo won’t fix a bloated template. Make sure the system works first—then dress it up.
Pro tip: If you find yourself spending more time decorating than actually using the template, stop. Function beats aesthetics every time.Grab Your Free Starter Template
To save you the hassle of starting from scratch, I’ve built a free Notion starter template you can duplicate into your own workspace. It’s simple, flexible, and designed to be adapted. It’s the perfect starting point if you’re managing blog posts, tracking projects, or just keeping a task list.
What you’ll get:
- A weekly to-do list you can reset and reuse.
- A calendar/database for projects, blog posts, or anything else you want to track.
- A lightweight misc section for add-ons like a habit tracker or reading list.
Sounds like something you’d like? Download the template here!
Start small with this template, test it for a week, and then tweak it to fit your own life. The best setups are the ones you’ll actually open every day. Give it a try, and let me know how you adapt it—I’d love to hear what you build!


2 Comments
Georgie S.
Another great article! Thanks!
Collin G.
You, my pal, ROCK! I found just the info I already searched everywhere and simply could not come across. Thank you!